This article describes how to set up automated version increments for use in CI build pipelines. I will go over 2 possible strategies: for simple CalVer workflow I would be using open-source Reliza Versioning tool. For fully synchronized workflow I would be using Reliza Hub SaaS.
Update 2025-05-29: You can now use Open Source Implementation of the Versioning Server using this library via Project ReARM instead of Reliza Hub as described in the tutorial here.
I Choosing Versioning Schema
For a software architect, one of the necessary first steps is to choose a Versioning Schema. Two most popular conventional models for today are SemVer and CalVer.
Both have their pros and cons. Discussing them in details is out of scope of this article, however I will highlight the differences very briefly.
Main benefits of SemVer are that it has a strict convention and allows to estimate amount of changes between versions by just looking at actual versions.
For CalVer, main benefit is that it allows to quickly see version relevance from today’s prospective (by establishing the difference between version’s date and today’s date). This part is essentially missing from SemVer, since SemVer versions tell nothing about when they were created.
However, downside of CalVer is predictably lack of difference semantics – for example, a year difference in CalVer versions may only be in a single line of code – and CalVer version usually would not have enough semantics to compensate. Even though CalVer is less conventionalized and actually presents by itself a class of version schemas which common pattern (usually, year and month).
So with these and other considerations (i.e., certain tools would require to use particular schema), it is required to pick a schema for the project.
II Simple workflow with Reliza Versioning OSS
Simple standalone workflow is usually based on automatic increment of previous version referenced somewhere in the source code or in the build process.
Reliza Versioning Open Source Solution has CLI that may be used in-place for version auto-increments in such workflows.
Let’s say we are using Ubuntu flavor CalVer (YY.0M.Micro). If we need to generate first version, we would run
docker run --rm relizaio/versioning -s YY.OM.Micro
Which would produce CalVer version based on today’s date. Since I’m writing this in February 2020, I’m currently getting 20.02.0.
Let’s now assume that I have an old version referenced that happens to be 20.01.3 and I need to do CalVer style bump on it. This means, that if date has changed, it will bump date first, so if I perform:
docker run --rm relizaio/versioning -s YY.OM.Micro -v 20.01.3 -a bump
I would get 20.02.0 (again, I’m writing this in February 2020).
Note that, if we’re still in February 2020 and our previous version is 20.02.4, running simple bump on that would produce 20.02.5, since only micro component may be bumped.
Now, if I deliberately only want to bump micro component and not bump date, I can run
docker run --rm relizaio/versioning -s YY.OM.Micro -v 20.01.3 -a bumppatch
This would in turn produce 20.01.4.
Simple enough? All that is left is to introduce this run command inside build pipeline.
Now, similar strategy works with SemVer:
docker run --rm relizaio/versioning -s semver
would initialize version at 0.1.0.
docker run --rm relizaio/versioning -s semver -v 3.8.2 -a bump
Would produce 3.8.3.
If we would to bump minor instead (and get 3.9.0), run
docker run --rm relizaio/versioning -s semver -v 3.8.2 -a bumpminor
Or to bump major (and obtain 4.0.0):
docker run --rm relizaio/versioning -s semver -v 3.8.2 -a bumpmajor
Now, how to use this in an automated git workflow? Easiest thing to do is to use a file – let’s call it “version” to synchronize. For example, on each CI run you could do something like
docker run --rm relizaio/versioning -s semver -v $(cat version) -a bumpmajor > version
Essentially, this would place next version in the version file. You may then do anything you like with this version. Note, that you have to git commit this in the course of your CI run to make sure proper version information is preserved.
III Synchronized Automated Workflow using Reliza Hub
Reliza Hub is a deployment and release metadata management tool. Above other features, it keeps track of project version schemas and version pins in project branches. Internally it uses Reliza Open Source Versioning tool described above inside but with more features added.
Let us now discuss how to mount fully automated workflow on Reliza Hub (note: Reliza Hub is currently in the public preview – until the end of 2021).
First, navigate to https://relizahub.com , proceed to the app, authenticate, accept the terms and confirm your email. Then create your organization and navigate to Projects:
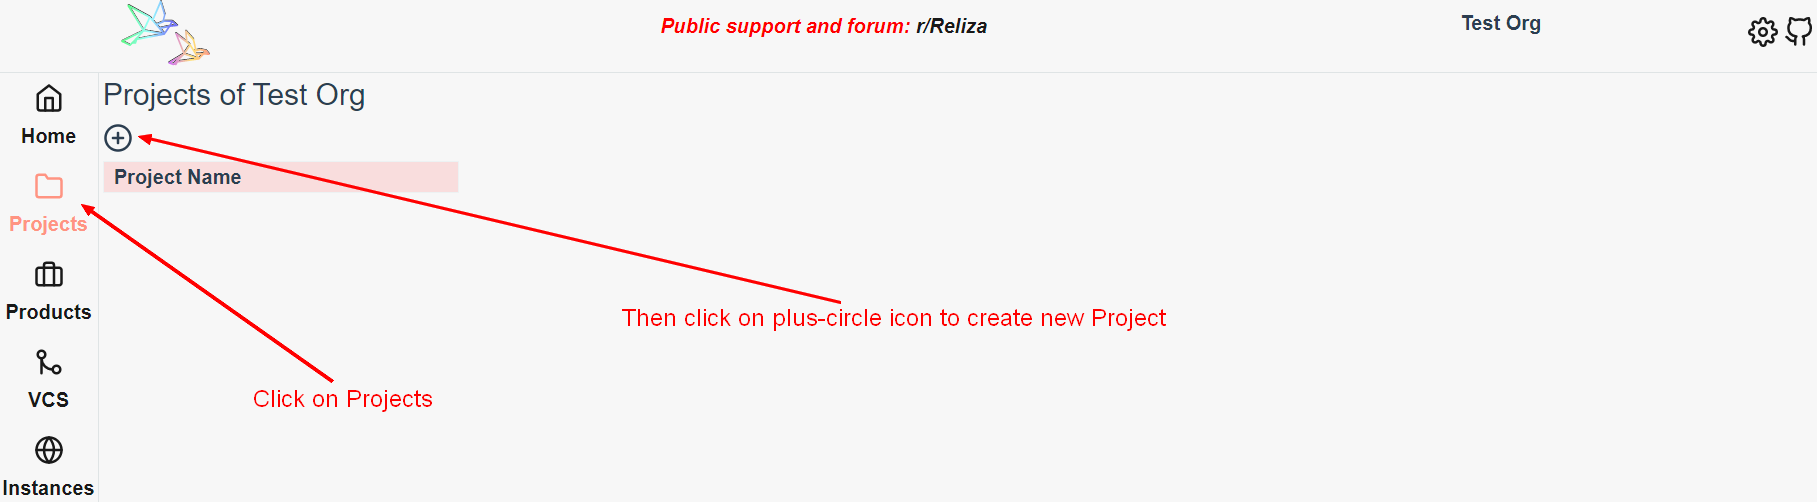
Then click on plus-circle icon to create new Project:
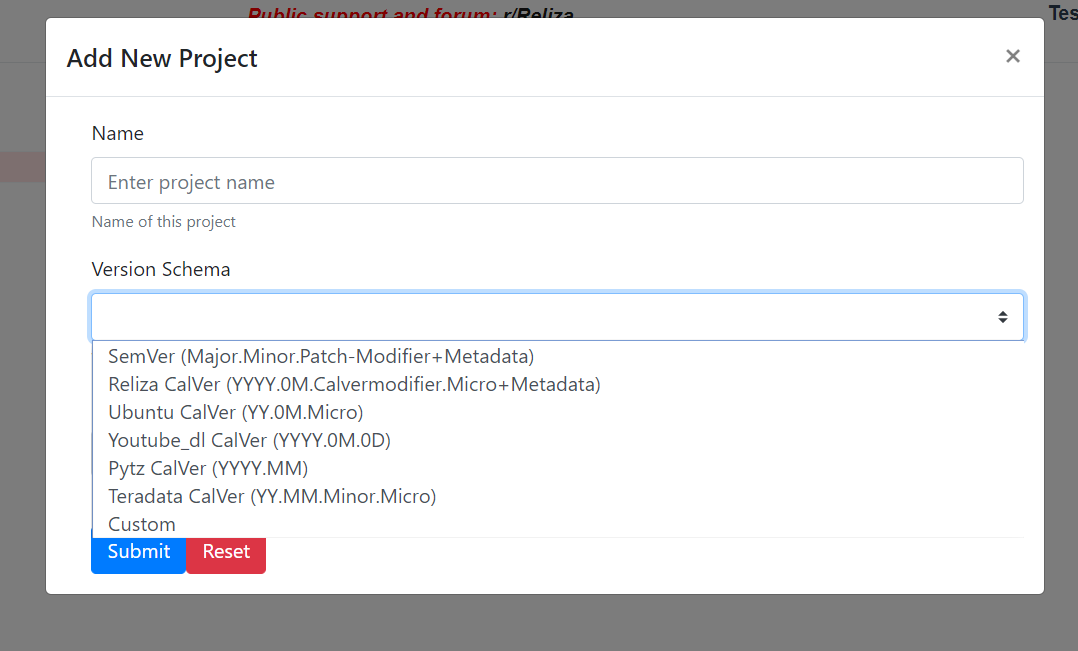
Enter desired project name and select one of provided version schema templates or click Custom and then enter your own custom project version schema (again refer to Reliza Versioning GitHub Readme for details on available components).
Next choose versioning schema for feature branches.
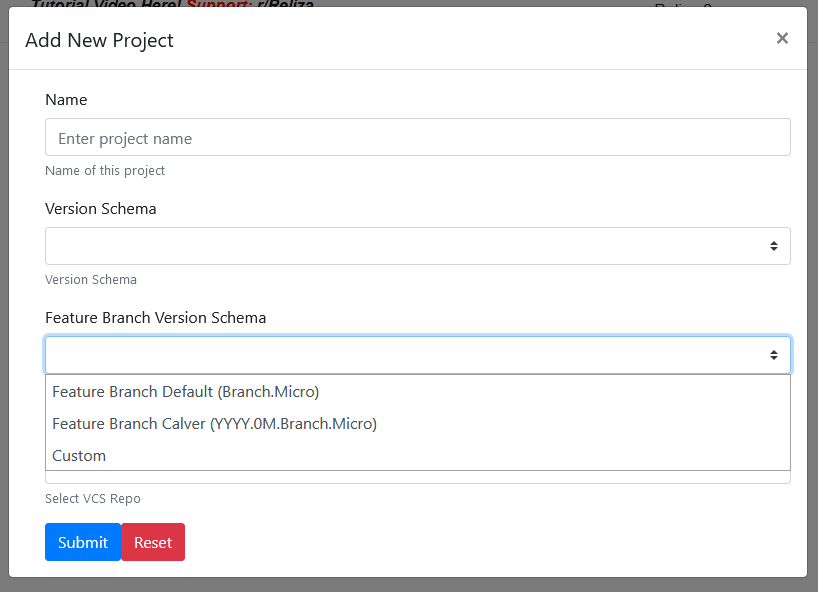
By default we suggest using “Branch.Micro” schema. Essentially, version would be name of the branch and Micro component starting with 0. So if your branch is named “Ticket-123”, then your first version would be “Ticket-123.0”, then “Ticket-123.1” and so on.
Alternatively, you can choose another schema for feature branches that you like. Also you would be able to manually set different schemas for release branches manually. Popular strategy for SemVer is to keep release branches on their own minors. Similarly for CalVer popular strategy is to pin Year and Month for Release branches (i.e., refer to Ubuntu releases such as 20.04.x). To achieve this functionality, Reliza Hub uses system of pins that you can set manually on branches, that I would present below.
For now, paste VCS URL of your project to complete its creation. Click “Submit”. Your project is now created.
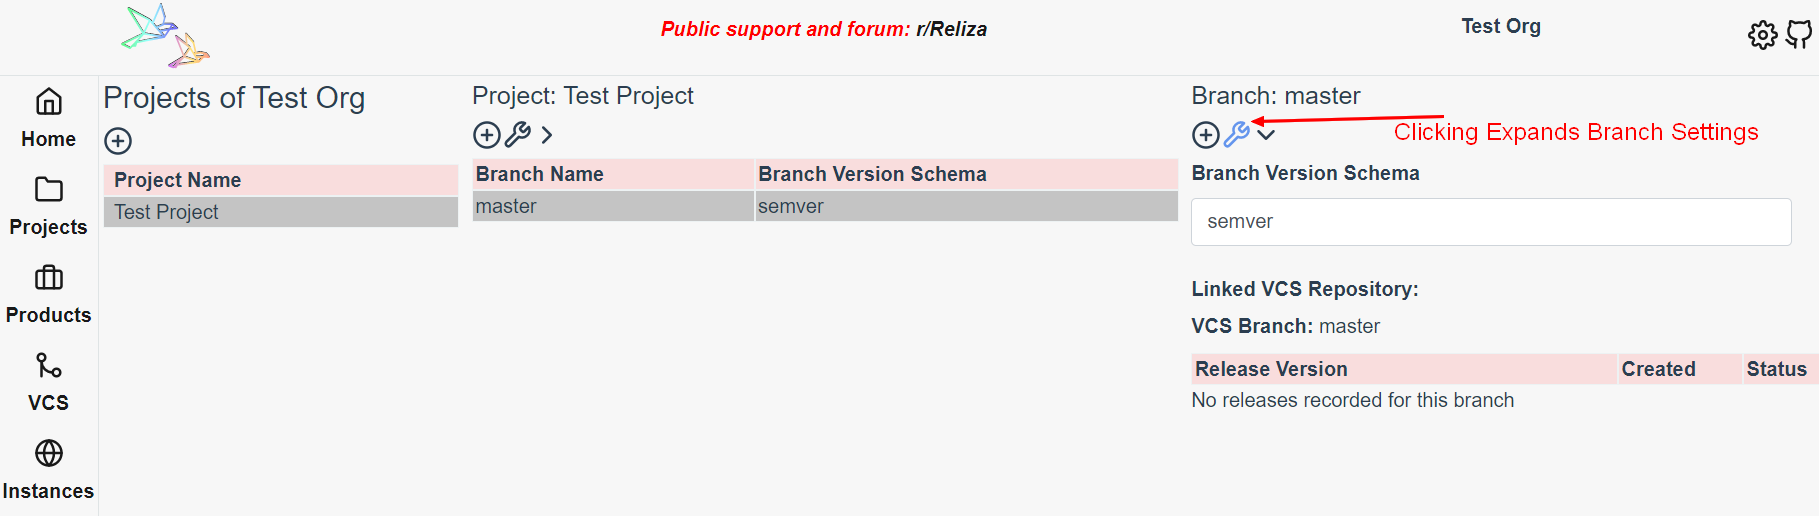
Notice that the system has automatically created “master” branch for you. If you click on it, you will see releases of this branch registered in the system (predictably, there are none at this point). Also notice, that master branch’s version pin matches project’s version schema exactly.
If you want, you may modify the version pin after clicking on the wrench icon above releases and thus expanding branch settings. For example, if you want to set pin to 1.3.Patch version – do just that and enter 1.3.Patch in the version schema. Essentially, this would keep branch’s version on Major being 1 and Minor being 3 and only Micro (or Patch) component will be changing across versions.
Now if you click on the plus-circle icon in the Branch column, you would be able to create release manually and system would auto-assign first version for you – 0.0.0 in our case. Every next click on the plus-circle (Add Release) would call version synchronization logic and yield next version (making sure that every version is returned only once).
However, what we really want here is to configure programmatic approach. Here is how:
First of all, we need to generate our API Key. For this, first expand the project settings menu by clicking on the wrench icon in the Project column:
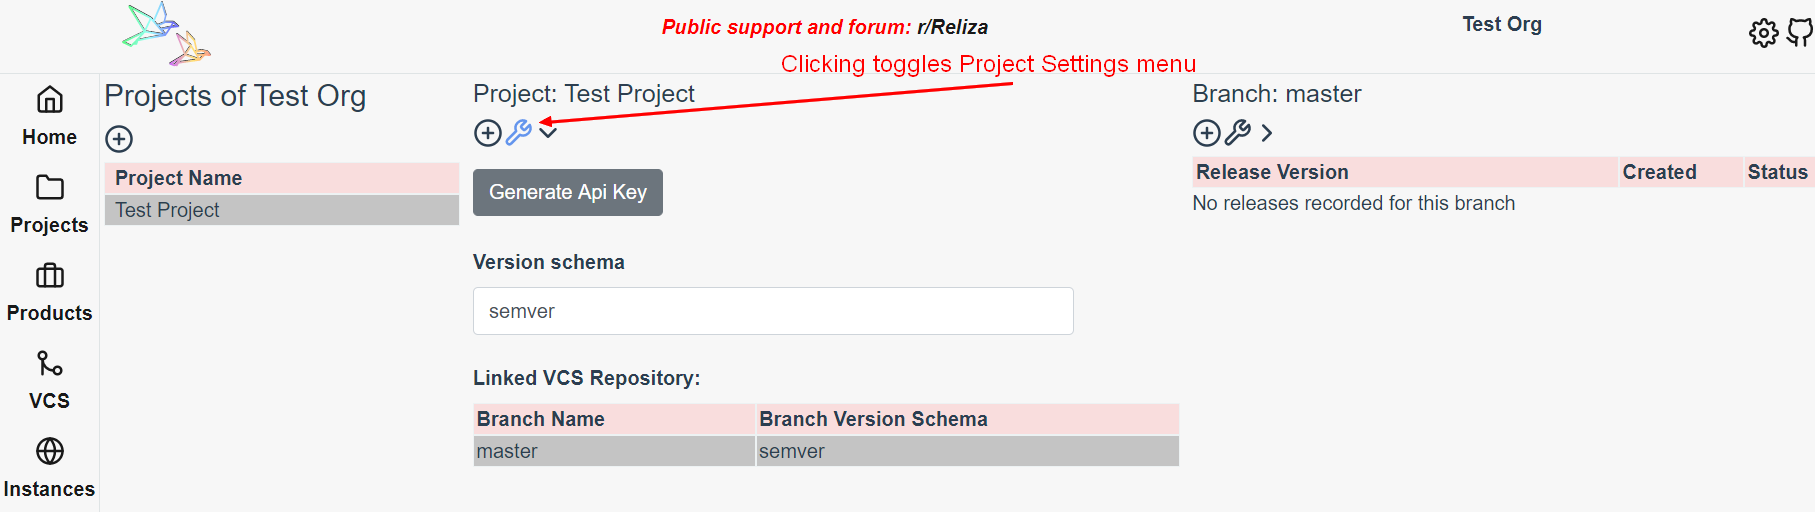
Then in the project settings menu click Generate Api Key. Note that subsequent clicking on “Generate Api Key” would re-generate the key and make the old one invalid.
Once you have the key, you may use Reliza CLI to obtain Version Assignment from the Reliza Hub. The call needs to be made as following:
docker run --rm relizaio/reliza-cli getversion -i $your_api_key_id -k $your_api_key -b master
Notice here that getversion keyword is a trigger to obtain version details from Reliza Hub. -i parameter stands for your api key id and -k parameter for api key itself, also -b parameter is required and denotes branch.
The tool would return next version for the branch in the json format, such as {“version”:”1.1.5″}. Json would also contain docker safe version which is useful for docker image tags as certain symbols are not supported there.
It is also possible to supply optional –pin flag for Reliza CLI, which may set or update version pin for new and existing branches. In example, if we want to create new Feb2020 branch, with SemVer version pin 1.2.patch, we would issue command as:
docker run –rm relizaio/reliza-go-client getversion -i $your_api_key_id -k $your_api_key -b Feb2020 –pin 1.2.patch
More details about Reliza CLI are provided on its GitHub page.
Summary
We covered above:
1. Simple workflow to auto-increment versions in the build pipeline using open source Reliza Versioning tool.
2. More advanced automated synchronization workflow using Reliza Hub. Note that Version Synchronization is just a small portion of Reliza Hub features, but discussing other functionality would be out of scope of this article. Particularly, check out our video tutorial for my advanced use cases of Reliza Hub.
1 comment
Comments are closed.