There are 2 most popular platforms today to host static websites: Netlify and Google App Engine (GAE).
Netlify gained a lot of popularity recently because it provides integrated experience with building and deployment static websites – all in the same platform.
GAE is more flexible in terms that it supports non-static web-sites as well but it certainly lacks the level of integration Netlify provides. So why would I still use GAE in many case? The answer is simple – frequently GAE provides better pricing options. At the same time it allows to have all the features of Netlify and more using few simple tools (GitHub Actions and Reliza Hub) which I’ll describe in this article.
Table of Contents
Pricing
Let me first cover pricing scenarios when GAE + GitHub Actions combo makes more sense. Key point is build minutes. Netlify’s free tier only gives 300 of build minutes per month, which is not much by any account. If you are using something like node.js app made static and your builds take 2-3 minutes on average, you only get about 100+ builds per month on Netlify, which easily may not be enough. Especially if you have more than one website.
If you need more build minutes on Netlify – either pay $7 per 500 extra minutes, or move to the next tier which includes 1000 minutes, but costs $45/month. On the over hand, on GitHub Actions you get 2000 build minutes free for private repositories and unlimited build minutes for public ones. Say you are building a documentation website and decide to make it public on GitHub – you get unlimited build minutes on GitHub Actions – and that makes a huge difference.
Next consideration is traffic costs. Netlify provides 100GB bandwidth egress per month included on its free tier, which is generous. Google offers 1GB egress per day free, which makes it around 30GB per month. So if your egress is between 30GB and 100GB you may get a better deal on Netlify. However, once you shoot past 100GB, Netlify charges you $20 for the next 100GB that month right away. Google has pricing policy per GB egress which costs $0.12. Meaning that you pay $12/100GB – vs $20/100GB on Netlify.
So depending on traffic, you may be better of either on Netlify or on GAE from the egress prospective. But in many cases GAE would provide better value here too.
Final word on pricing – if you are using something like GitHub Actions or CircleCI for your builds, you could still deploy on Netlify – which makes GitHub Actions more flexible system.
Configuring Google App Engine Project
We start by going to https://console.cloud.google.com/appengine and create a new project. If you had one already – first click your project name on the top and then click on NEW PROJECT.
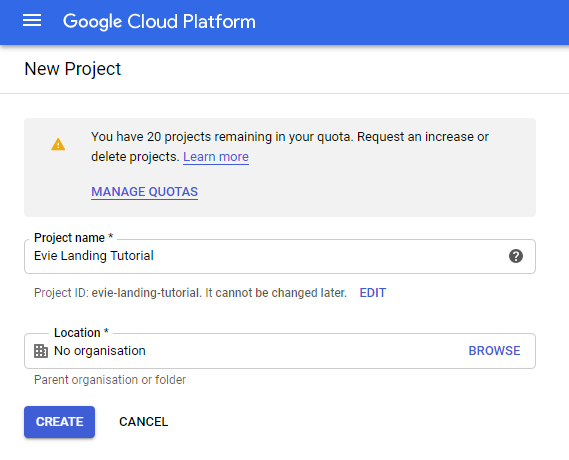
Enter project name, note here project ID that you’re getting (you will need it later) – in my case it is “evie-landing-tutorial” – and click CREATE. Then switch to this project from the project selector on the top of the page.

Click on Create Application and choose your desired region. Then for static application select Python and Standard environment (free tier applies only to Standard environment). At this point your application is ready for the next steps.
To point your domain name to this application, navigate to https://console.cloud.google.com/appengine/settings/domains
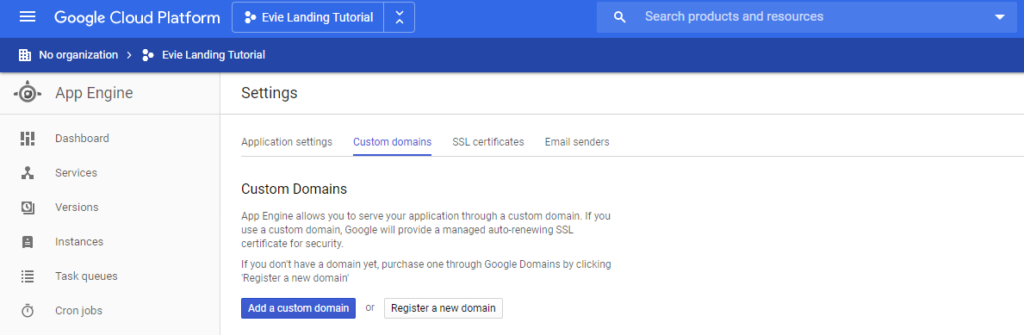
and click Add a custom domain. Follow instructions and point DNS from your domain to Google’s provided records. When this is done, Google would automatically point your domain to this application and also manage SSL certificate.
Finally, we need to prepare service account which would be responsible for automatic deployments. Navigate to https://console.cloud.google.com/iam-admin/serviceaccounts?project=your_project_id (replace your_project_id in this link with your actual project id, in my case this would be evie-landing-tutorial). You will get to the following menu page:
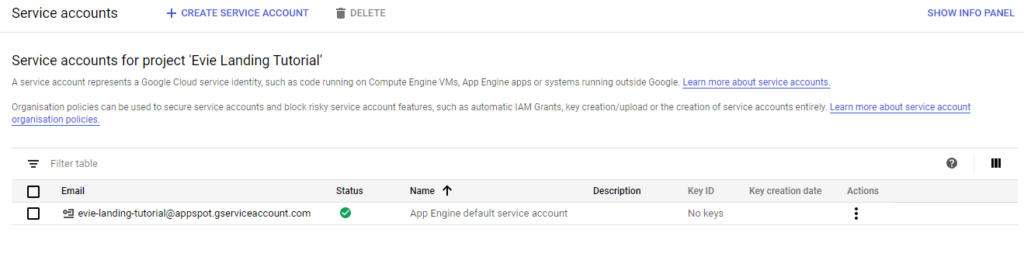
Click on the 3-dot icon in the Actions column near App Engine default service account. And select Create key option from the drop-down menu.
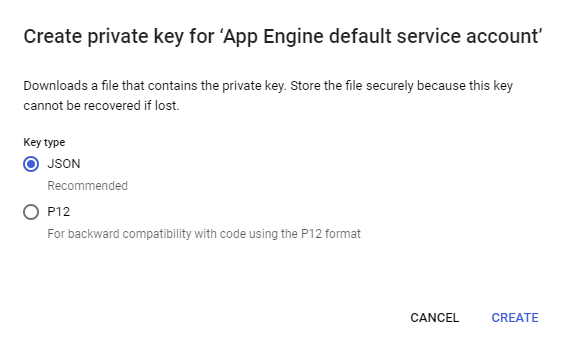
Choose JSON as your Key type and click CREATE. This will download .json file to your machine. Last thing we need to do here is to encode this file in base64 format – we will need this later when moving to GitHub Actions.
This can be done by using command line as following:
base64 your_json_file.json > key.base64Then key.base64 file would have the base64 encoded key.
Security note here: these json and base64 key files allow to control your GAE project, therefore after you add them to GitHub Actions (as I’ll show below), it is recommended to shred delete this files. This can be done from cli as following:
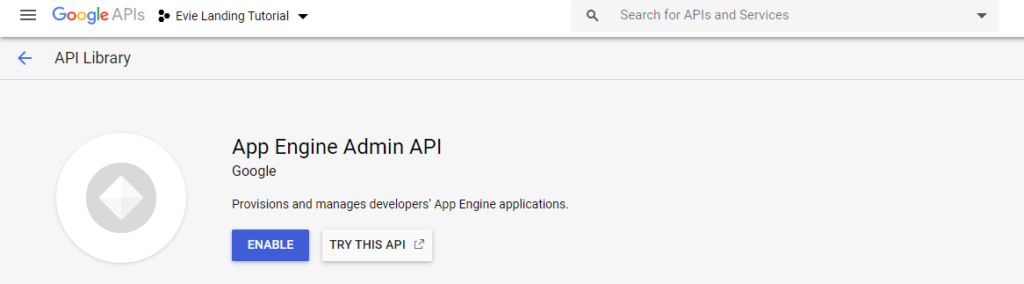
shred key_file_name && rm key_file_nameOnce the key is obtained, we need to enable Google App Engine APIs – to do so visit the page https://console.developers.google.com/apis/api/appengine.googleapis.com/overview and click ENABLE.
Setting Up GitHub Repository and GitHub Actions
Finally, it is time to prepare our GitHub Repository. This tutorial covers setup of Evie theme by Undraw. (This is the theme I am currently using for the Reliza Hub landing page!) The original Evie theme is hosted here, but I will be using Reliza’s fork in this repository.
As I mentioned already in other articles, my build philosophy these days is to dockerize everything and use docker build as a unified CI build environment across multiple platforms. Therefore, I added Dockerfile, nginx configuration and also updated npm versions relative to original Evie theme to have a working dockerized build.
Now if we do docker build command on the Reliza’s Evie repository contents, it will build an nginx-based image serving Evie theme without documentation on port 80.
It is now time to prepare GitHub Actions script. We will be using actions-hub/gcloud@master action which makes the whole process simple.
We start by setting 2 GitHub Actions secrets needed by the action. Navigate to Settings -> Secrets inside your GitHub repository and click New secret to set following 2 secrets:
- GCLOUD_PROJECT_ID – set it to the project id noted when you were creating your project: evie-landing-tutorial in my case.
- GOOGLE_APPLICATION_CREDENTIALS – set it to the contents of base64-encoded json-key file obtained for google service account above.
Now in the repository I create .github directory and then workflows directory inside it. And inside it I create gae_build.yml. Also we need to add app.yaml file which contains GAE configuration and would be very simple for the static app use case that I have.
After you commit and push this code, it will trigger GitHub Actions build, which will make a deployment to your GAE application – and your services would go live! Every subsequent push to GitHub will automatically trigger a new GitHub Actions build and automatically update application on GAE.
Now you have basic CICD pipeline for your static website ready! You can stop here or you can continue reading how you can add approval and deployment visibility functionality using Reliza Hub.
BONUS: Adding Approvals and Visibility Using Reliza Hub
Suppose, that we do not want every new build to go to production automatically. Instead, we want them to be deployed first somewhere which is not production, and then if we like them – you or your approver (say, your Marketing Manager) needs to click a button and promote to production.
Here is how this can be achieved with Reliza Hub on top of the configuration I described so far.
1 – Streaming Release Metadata to Reliza Hub
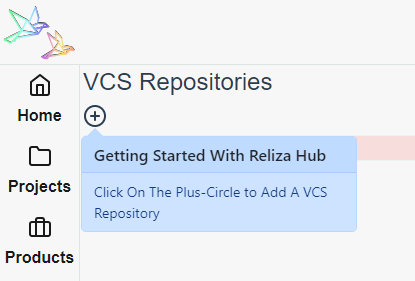
First, navigate to https://app.relizahub.com, authenticate with GitHub and create your organization, in my case I will use “Evie Landing Tutorial” as organization name. Click on the VCS menu item and then on the plus-circle icon to add a VCS Repository.
Paste your GitHub repository URI in the input and Reliza Hub will parse it automatically.
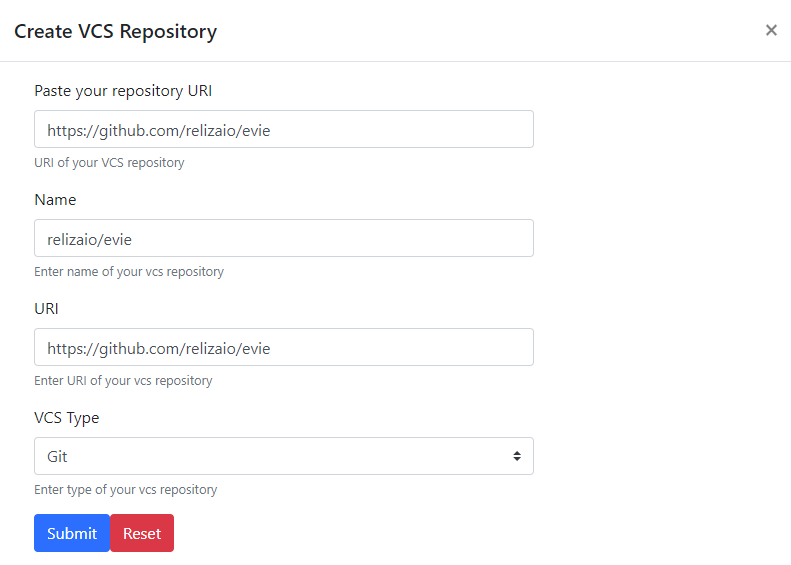
Click Submit, and this will create your repository. Proceed to Projects menu and click on plus-circle icon to create a project. Enter your project name (I will use Evie Landing). Set version schema to Single Component (Major) – that is because GAE is using its own versioning consisting of one component – which we will use inside Reliza Hub as is. Choose VCS repository to be the one you just created in the previous step.
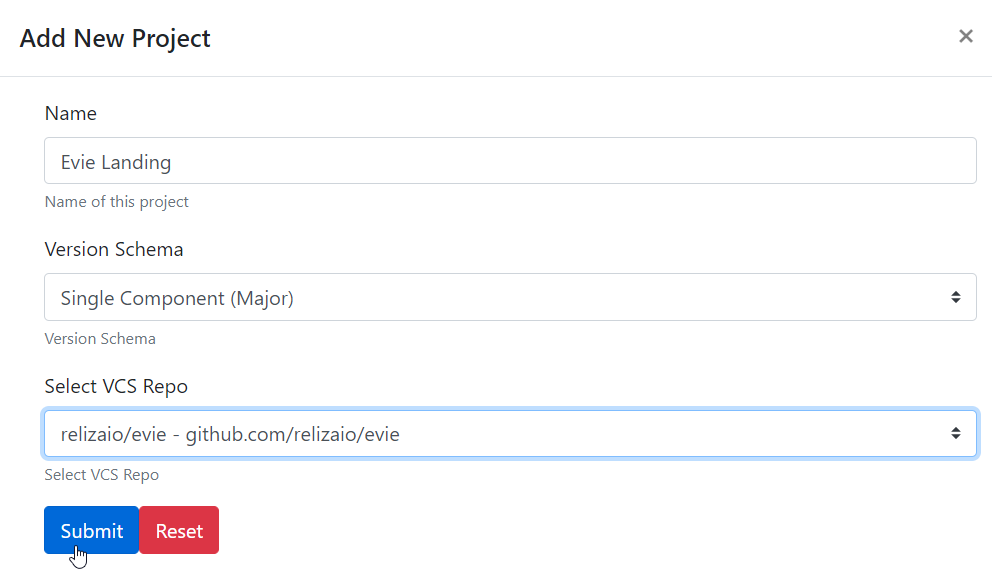
And click Submit. This will create new project. Then click on this newly created project name and click on the lock icon to generate project api key.
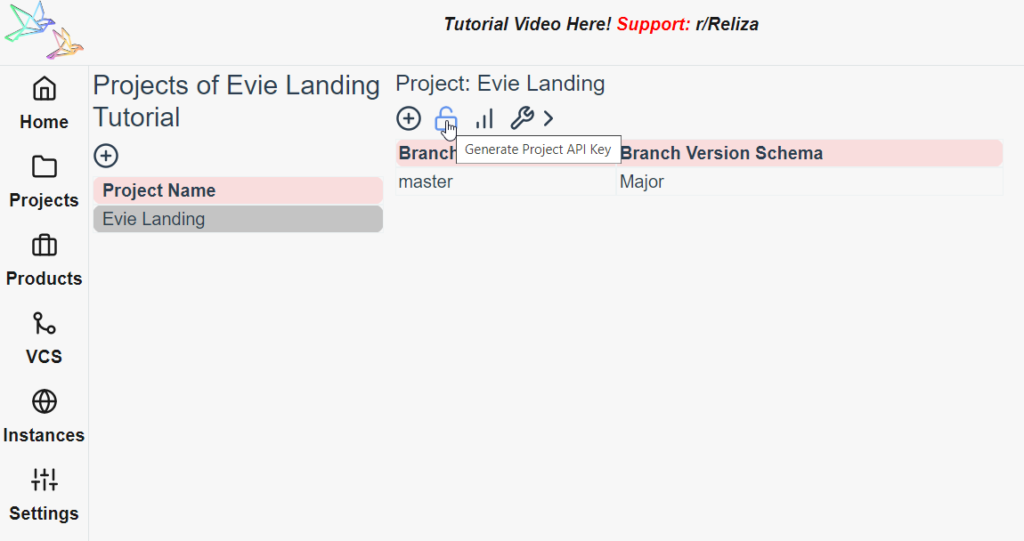
When you see API ID and API Key generated for your project, create 2 new secrets in GitHub Actions – RELIZA_API_PROJECT_ID and RELIZA_API_PROJECT_KEY with corresponding values.
Now, it is time to update our gae_build.yml script to stream build details to Reliza and also switch to no-promote mode. This means that on every git push, a deployment will be created on GAE, but Google will not switch traffic to this new deployment until some manual step later.
The updated script includes reporting of build time tracking to Reliza Hub and will also has URI of each non-promoted deployment on GAE. You can find the description of the various flags we use in the GitHub repository of Reliza Go Client.
After GitHub Actions run on push completes, you can then navigate to the page of your release in Reliza Hub and see the following picture:
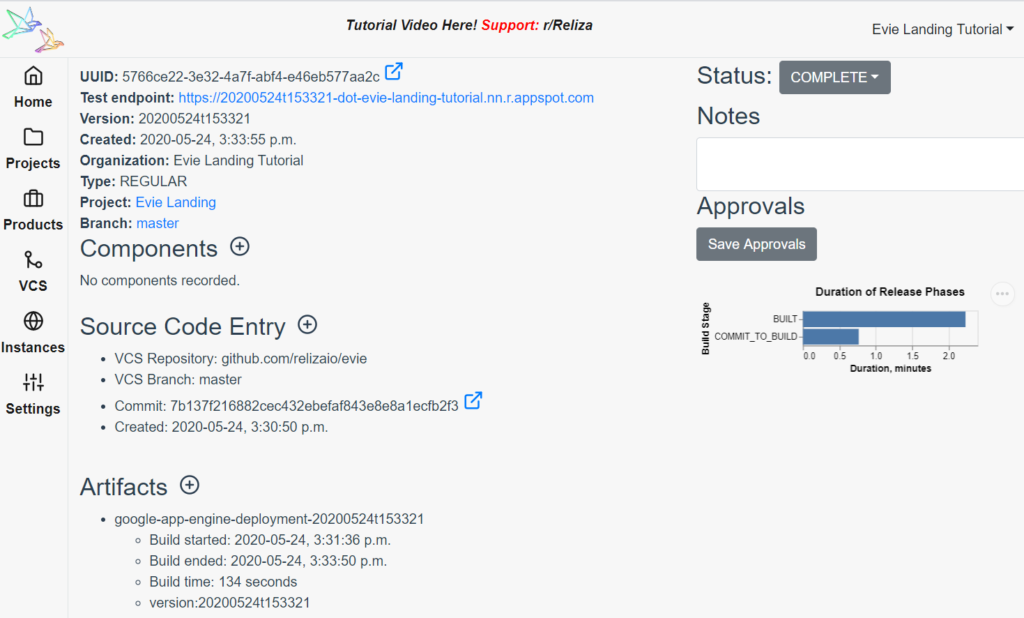
Note that clicking on the Test endpoint link will bring you to the actual deployment version on GAE corresponding to this source code entry – but not yet promoted to serve traffic.
You can also add slack integration following the guide here to receive notifications of every new release on Reliza Hub.
2 – Adding Approvals
Go to Settings page of Reliza Hub and in the bottom of it configure your approval matrix for PRODUCTION environment. In my case, I will require only an approval from MARKETING for a release to be promoted to production. As following:
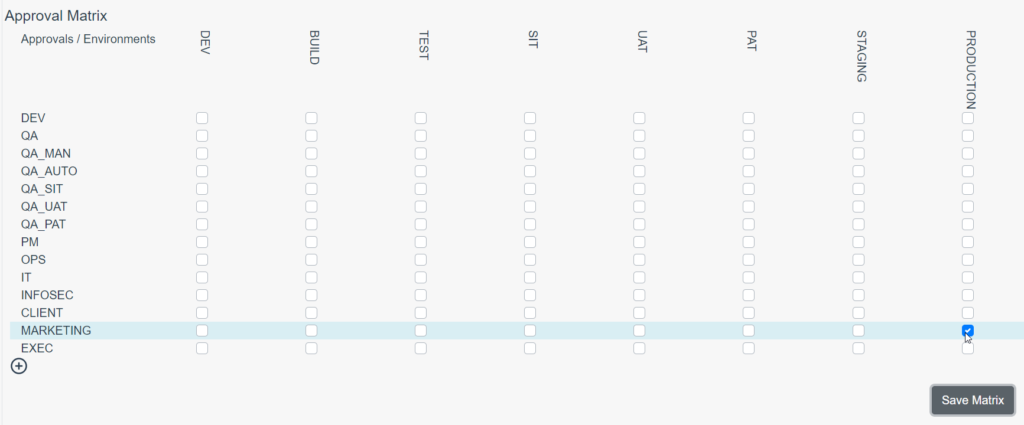
Click on Save Matrix.
Next I install Reliza GitHub app – https://github.com/apps/reliza-hub – and follow the tutorial I’ve written earlier to register it for the project.
Finally, I commit a new GitHub Actions workflow that would be triggered on approvals from Reliza Hub – you can see it here. Essentially, this workflow queries Reliza Hub for the most recent production-approved version and then requests Google App Engine to switch traffic to that version.
The only thing that requires configuration in this script is RELIZA_PROJECT_ID environment variable – which needs to be set to project UUID obtained on the project page in Reliza Hub:
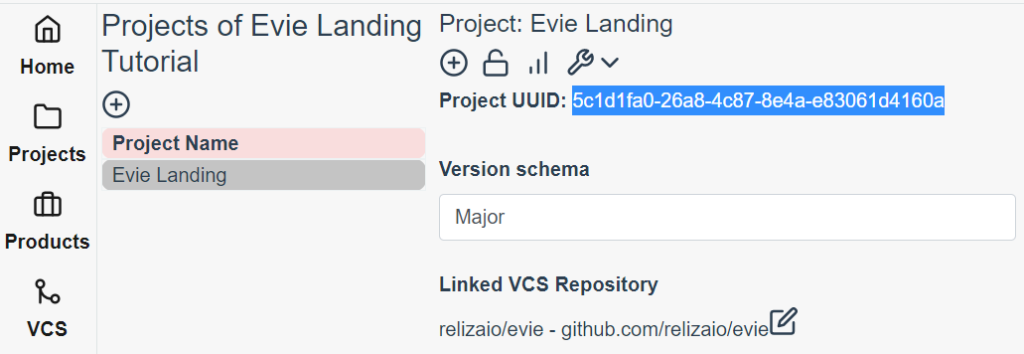
Now, latest project release with an approval from MARKETING would get automatically promoted on the Google App Engine side.
For details, how you can add approvers to the organization, watch my tutorial video on approvals.
3 – Add Visibility for What is Deployed When
Finally we want to add visibility on Reliza Hub as to what release is actually deployed and when.
To do so first go to Instances in Reliza Hub and click plus-circle icon to create new instance.
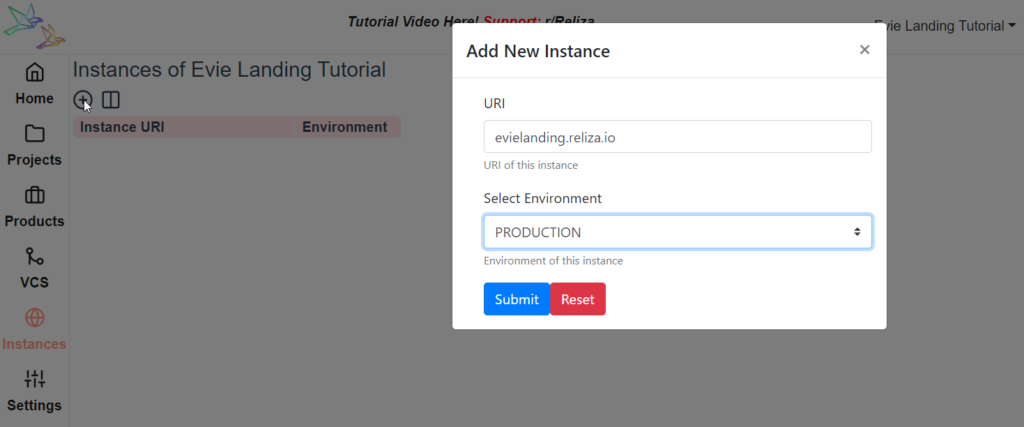
I then enter URI of my instance and select environment to be PRODUCTION – since I only have production environment on this static website. Clicking Submit creates my new instance.
Next I select this newly created instance and click on the lock icon to generate its api key.
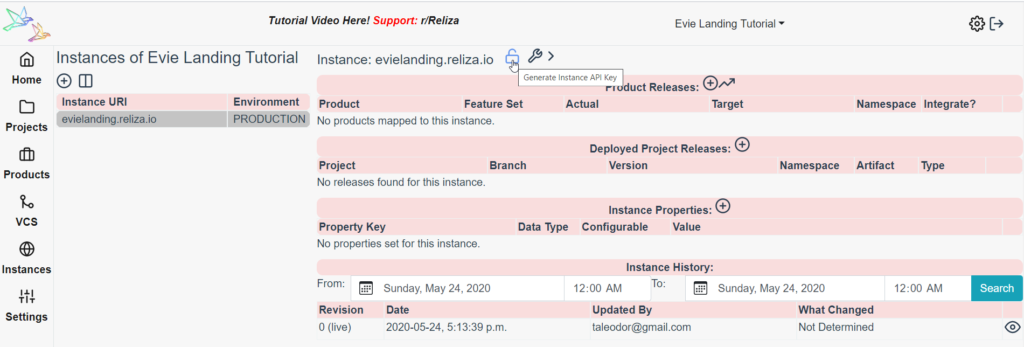
When API ID and API Key are generated, create 2 new secrets in GitHub Actions – RELIZA_API_INSTANCE_ID and RELIZA_API_INSTANCE_KEY with corresponding values.
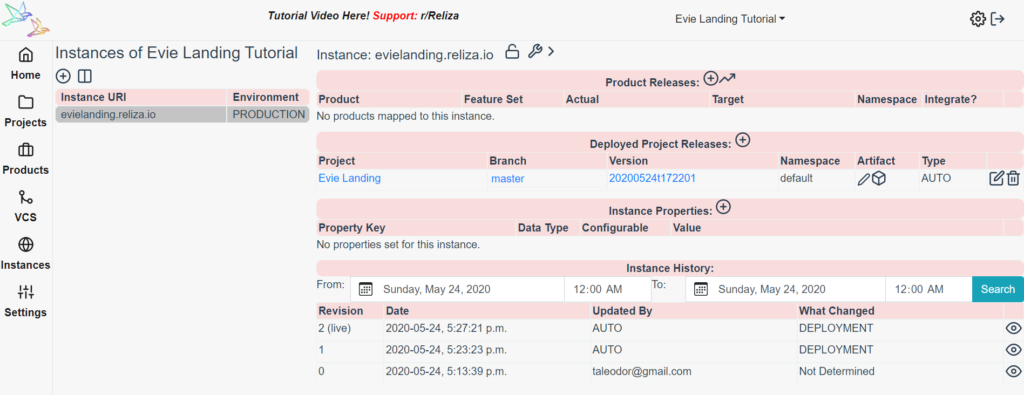
With this I first update my on-approval deployment script to add section to check for deployment on GAE and stream it to Reliza Hub. And I also add a cron GitHub Actions workflow to verify the state of my GAE application.
After any of this workflows runs, we will get the deployment snapshot of our GAE application in Reliza Hub in our instance view as following:
Summary
This is it, now we have a full push-button CI CD pipeline with GitHub Actions deploying to GAE and approvals and visibility managed by Reliza Hub. We can also have Slack notifications and our Marketing manager viewing changes and pushing buttons to promote them to production without asking technical staff. How cool is that?
If you would like to talk to me and discuss this or other workflow further – book a no-strings-attached 30-minute Reliza Hub demo call with me – and I will try my best to help.
2 comments