This tutorial describes Reliza CD – agent that connects Kubernetes clusters to Reliza Hub and allows to deploy software from the hub. This post continues my previous tutorial on Reliza Hub Ephemerals – but here I describe how to configure Persistent instances rather than ephemerals.
Much of the same setup as in the Ephemeral tutorial is used here. We will be deploying same Rebom project. Particularly, sections I to XI from the ephemeral tutorial apply to this one as is – so I will omit those and assume they are already done.
Table of Contents
I Have your Kubernetes cluster ready
For the purpose of this tutorial, any Kubernetes cluster can be used, including locally running K3s. Easiest way to run it is via Rancher Desktop project.
You also need some ingress configured on the cluster. Again, if using K3s, it would have Traefik out of the box.
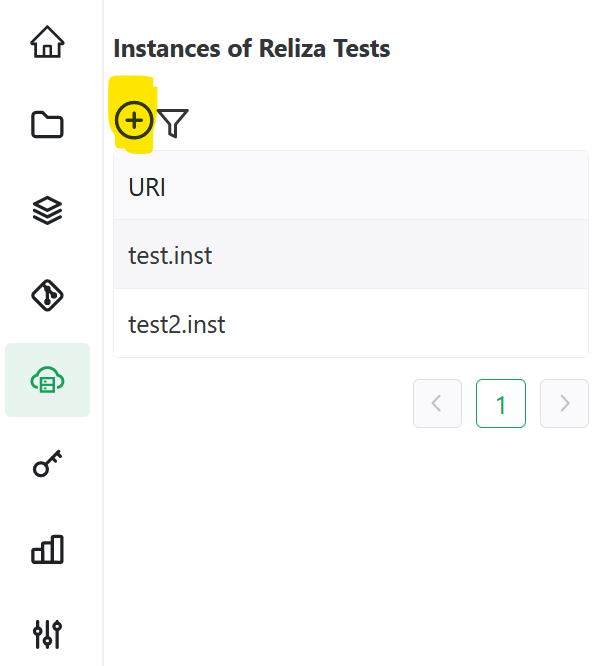
II Create Instance in Reliza Hub and Get API Credentials
In Reliza Hub, navigate to the Instances page and click on the plus-circle icon to create an Instance.
In the next menu, stay on the Manual tab and choose descriptive URI for the instance (this does not have to be a real URI for the case of a local instance). Then select desired environment – I will choose DEV as following –
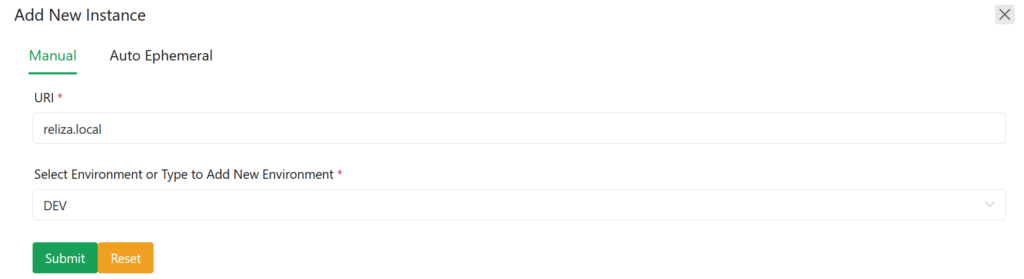
Click on Submit and an Instance object will be created in Reliza Hub.
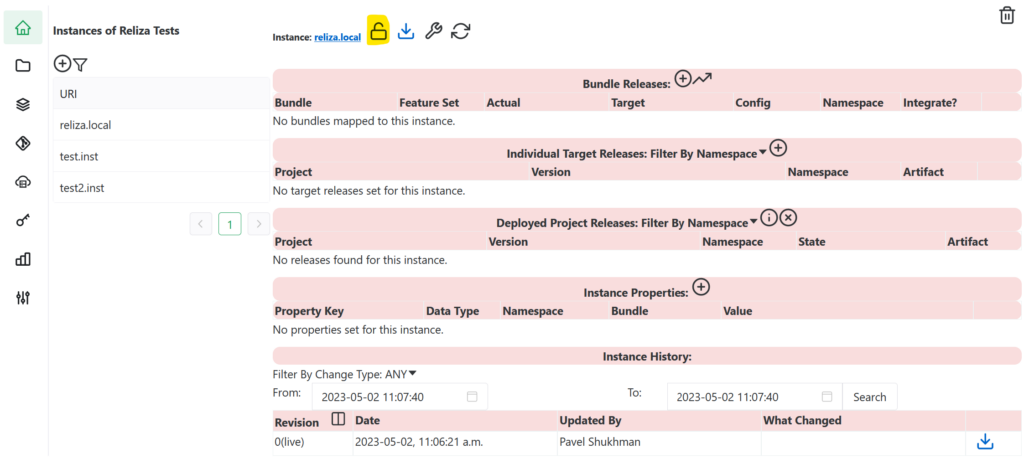
Once the instance is created, select it in the menu and click on the lock icon to generate API credentials.
Note generated API ID and API Key – we will use them later in this tutorial.
III Install Reliza CD on Cluster
Make sure you have Helm installed (see my previous post on more details on this) and your Kubectl context is pointing to the right cluster.
The following commands will install Reliza CD to the cluster (replace actual_reliza_api_id and actual_reliza_api_key with the credentials values noted above):
helm repo add reliza https://registry.relizahub.com/chartrepo/library
helm repo update
helm upgrade --install reliza-cd \
     --create-namespace -n reliza-cd \
     --set create_secret_in_chart=regular \
     --set relizaApiId=actual_reliza_api_id \
     --set relizaApiKey=actual_reliza_api_key \
     reliza/reliza-cd
Wait a couple of minutes for the reliza-cd pod to be up and running – you can check the status with kubectl get po -n reliza-cd.
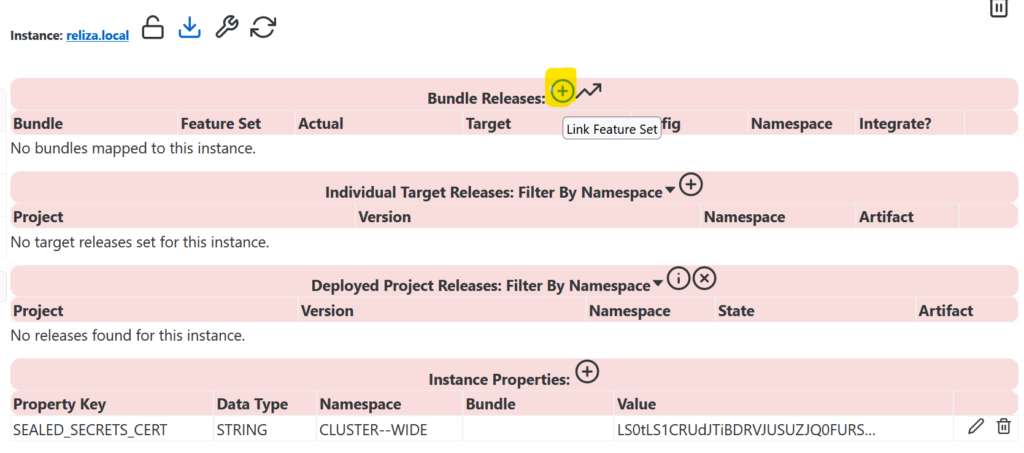
Refresh the instance page on Reliza Hub and you will notice that it now shows Bitnami Sealed Secrets certificate in the properties section.
We are now ready to deploy software onto our instance from Reliza Hub.
IV Install Rebom Project from Reliza Hub
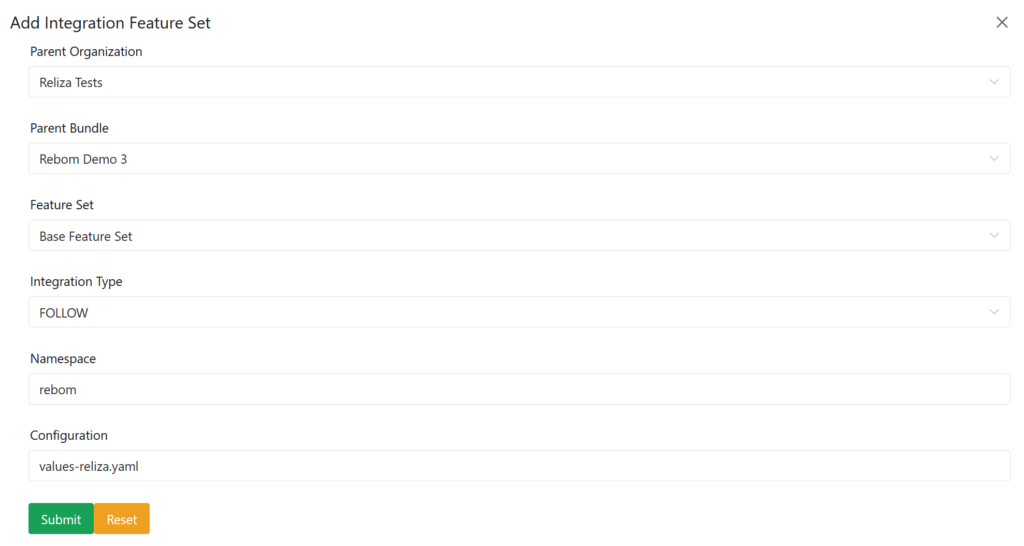
On the Reliza Hub instance page, click on the “Link Feature Set” plus-circle icon near Bundle Releases:
In the next menu, pick our Rebom project, select desired feature set and use Follow integration type. This would essentially resolve to using the latest available version for this environment.
This behaviour may be configured via Approval Matrix – principle of the matrix is shown in this older video and I will describe it in more detail in a future tutorial. For now, however, this will be just the latest available bundle version.
Select desired namespace – this can be any namespace that you want. The namespace will be created by Reliza CD if doesn’t exist already. Then set values-reliza.yaml – values file we want to use as Configuration – we pre-configured the file in the ephemeral tutorial.
The complete entry would look similar to this:
V Set Secrets and Properties
Our deployment is mostly complete but notice that our FQDN property is not set up and our secrets are not shared with this instance.
We will first share secrets, for this on the Secrets page, edit distribution for our rebom_registry_login and rebom_registry_token secrets and make them READ_ONLY for our new instance.
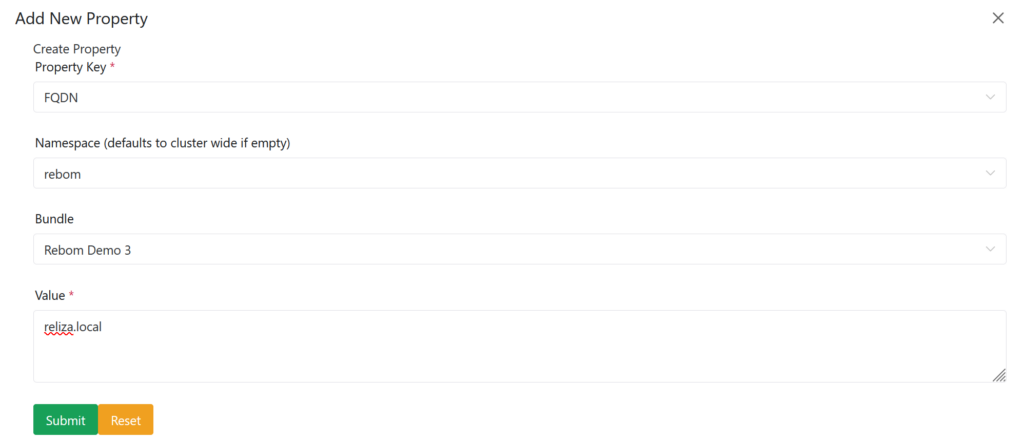
Next, on the actual instance page, let us add FQDN property. For this, in the Instance Properties section, click on the plus-circle icon – Add New Property Manually:

Choose FQDN property key if available – this should be available if you followed ephemeral tutorial (or create a new FQDN property with String type). Select your namespace and bundle and enter FQDN value. If you used a real DNS instance, this should be actual host name, for local instances this can be any distinctive value.
Complete entry would look like this:
Click on Submit. Then wait for few minutes – you will also receive notifications if you set up Slack or Teams notifications for the organization – refresh Instance view – and you will notice that Rebom project is now deployed.
Instance View would show that the actual bundle version matches target and will also list deployed components:
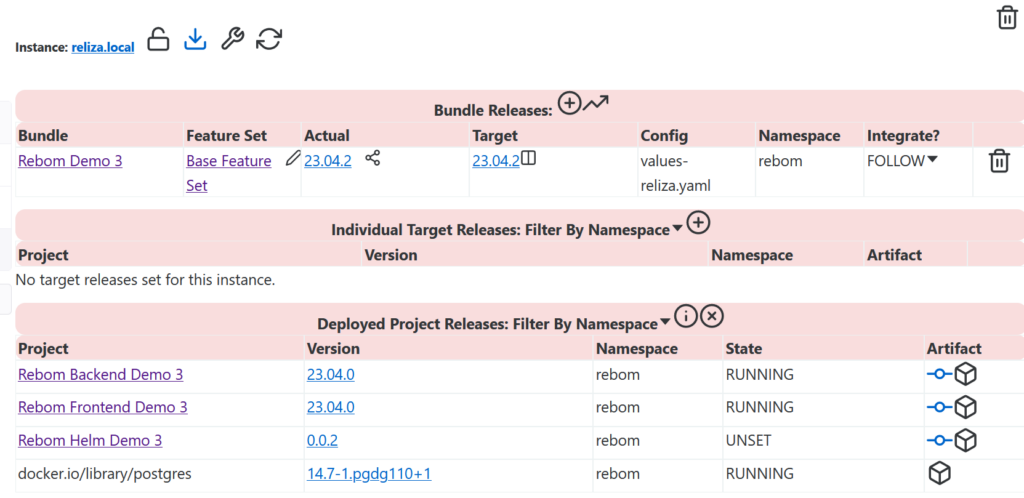
If you access your cluster ingress, Rebom should now be operational.
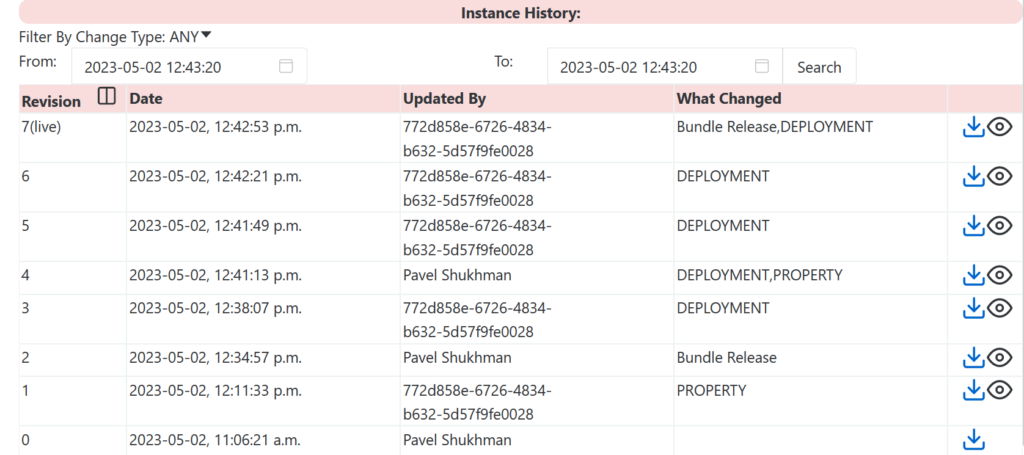
Just for reference, here is my deployment timing which can be seen in the Instance History section:
VI Summary
I have shown above how a persistent instance can be connected to Reliza Hub via Reliza CD.
From here Reliza Hub can be used to do various instance manipulations – mainly deploying and undeploying software, changing configuration and controlling versions.
I will try to cover those in more detail in future tutorials.
3 comments